Step 1
To get Ozgar.ai up and running, start with provisioning a Linux x86_64 based VM with the specifications below:
- OS: Ubuntu 26.04 LTS
- 8 vCPUS
- 48 GB Memory
- 256 GB Data SSD (mounted at / or /var)
The VM should have network connectivity to access application container images from:
Additionally, root or sudo access is required on the VM, and curl must be installed:
sudo apt update && sudo apt install -y curl
The recommended deployment method is docker-compose based, and supports a one-click installer and updater through the vendor portal at https://deploy.ozgar.ai/.
If you don't already have a user account for the vendor portal reach out to your Customer Success Manager at Ozgar.ai, or file a ticket through the support portal.
Step 2
Then, setup LLMs to be used with Ozgar as described in the quick start section of the LLM Recommendations guide.
Step 3
Create the deployment through the vendor portal.
- Open the portal: https://deploy.ozgar.ai/
- Navigate to Deployments in the left sidebar of the portal
- Click New Agent, assign a name, and click Continue
- Copy the generated
curlinstallation command (this will be used later) - Open the Application tab and select Ozgar
- In the Environment section, define a unique PostgreSQL password:
-
POSTGRES_PASSWORD="REPLACE_WITH_A_SECURE_PASSWORD"
-
- SSH into the target machine where Ozgar will be installed
- Run the
curlcommand you copied from the Distr dashboard
The Distr agent will automatically:
- Install Docker if required
- Start the Distr agent container
- Deploy the Ozgar application
Step 4
Once the application shows up as Healthy in the vendor portal, open port 80 on the VM that's running Ozgar, e.g.: http://10.0.10.123:80.
You should now see the Ozgar.ai Setup Wizard where you can setup an admin user, and configure the LLMs. Get the LLM URL and API key from the Azure Foundry portal where the LLM was created in Step 2 above.
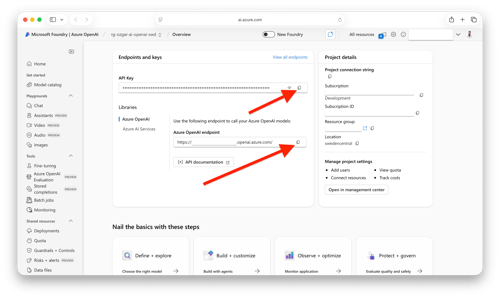
Finally, you can setup the SMTP server that should be user by Ozgar.ai. Note: Without an SMTP server configured, password reset is unavailable. Please ensure you remember the administrator password.
Step 5
Once the initial Ozgar.ai setup is complete, connect the source system that Ozgar.ai will analyze (for example, IBM i). In the admin section, create a new space, and then configure the appropriate connector for the target system. Please make sure to select the correct Source Libraries, Database Libraries, and Program Libraries.
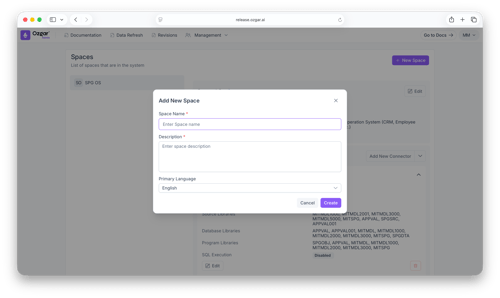
Finally, navigate to the Data Refresh tab and initiate the first data refresh. Note that this process can take a few hours depending on the size of the codebase.